Adding navigation to a StudioPress child theme is a simple process when you know the steps. In version 1.8, you will need to use the WordPress Menu creator to generate your Primary and Secondary navigation menus. But first, you have to make sure Genesis is setup.
Setting Up Genesis
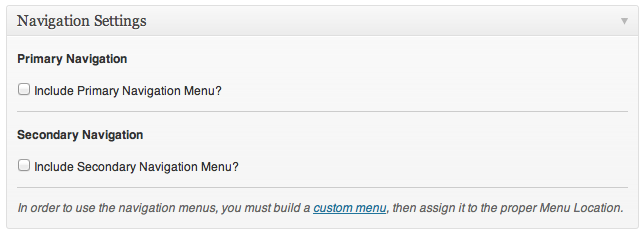
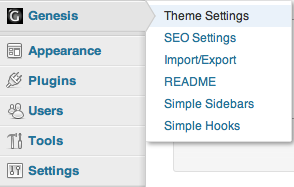 In the Dashboard, go to Genesis>Settings>Theme Settings. This will take you to the Genesis setup window for you to set all the defaults.
Scroll down to the Navigation Settings meta box. Here you will see two check boxes, one for Primary Navigation and the other for Secondary Navigation. Check the box for the navigation menu you want to use.
By checking one or both of these boxes, Genesis will add the necessary code to the site to render the navigation menus.
Setting up the Menu
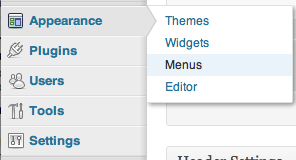 Now that Genesis is ready for the menu, WordPress can create the menu and populate the navigation. In the dashboard, go to Appearance>Menus.
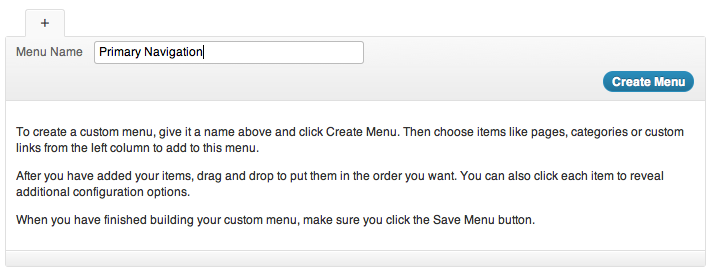
Click the plus sign, [+], at the top of the page. In the Menu Name field, type ‘Primary Navigation’ and click ‘Create Menu.’
You will now have access to three new metaboxes, the Theme Locations, Custom Links, Pages and Categories. If you have other plugins or software installed, you may have additional options.
- The Theme Locations is your Primary and Secondary navigation that is activated by Genesis Settings.
- The Custom Links allows you to create links to external pages or sites by adding the URL and a Menu Label (name).
- The Pages box lists all the pages you’ve created. They will be sorted by ‘Most Recent’, but you can ‘View All’ or ‘Search’ for specific pages.
- The Category box list all the categories that you’ve created for your posts.
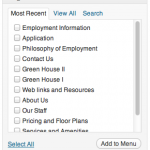
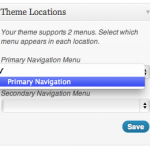 In the Theme Locations metabox, select the Primary Navigation from the drop down. Now go to the Pages metabox and select all of the pages that you want included in your Primary Navigation. Place a check in the check boxes and then click ‘Add to Menu.’
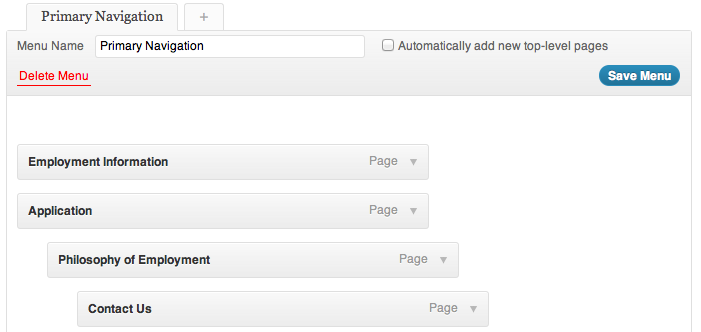
All the pages will populate the menu field to the right of the metaboxes.
You can then drag the boxes around to get the navigation in the order you want it to appear on your site. Move them up and down to arrange the order, move them under and indented to make them a submenu. You can move them around to fit your desired navigation structure.
Onc you have the menu the way you want it, click ‘Save Menu’ and you menu will be live on the site. Go to a page on the site and you will see the Primary Navigation displayed the way you set it up in the dashboard.
You can add pages or remove pages as often as you need. When you create a new page, if you want it to be included in the navigation, you will have to manually add it in the Menu.
If you have any questions, leave them in comments below.

I don’t have the checkboxes you display above. What am I missing?
Sorry, I found it. The “Navigation” items in Settings were merely collapsed.
Glad you found it.
this is just great!
I am using Education Child Theme. My question is, how to set a label/text as a separator, instead of a page?
Go to you Appearance/Menu. At the top is a section for “Custom Link.” Set the URL to http://# and the Label to the text you want to use. When you Add to menu and save, the text will be in the navigation, but will not link to a page/post.
Hi ! I want to add external website’s link in the genesis menus.. check attirevilla.com When someone click Online Store in the menu, there i want to redirect it to some other website . kindly help!
To add a link in your navigation, go to Appearance/Menu in your dashboard. If your on 3.5 or earlier, you would us the “Custom Links” section. If your on 3.6, you would use the “Link” section. Simply add the URL you want to link to and the Name, click “Add to menu” and your link will be in the navigation.